Tracker RMS - CRM integration setup
This guide will walk you through connecting your idibu account to Tracker RMS, enabling seamless candidate and vacancy data transfer between the two platforms.
Here is the basic outline of how this integration works:
- The integration uses idibu iframe, which opens up idibu's dedicated interface as part of the posting process.
- All candidates are forwarded from idibu to Tracker RMS automatically via webhooks.
Prerequisites
- You must have admin access to both your idibu and Tracker RMS accounts.
- You will need your idibu App ID and App Secret (provided by your idibu account manager or generated directly on your idibu account).
Step 1: Enable the idibu integration
- Log in to Tracker RMS as an administrator.
- Under My Settings area, scroll down to the Plugins section and locate the idibu option.
- Switch it on - the Idibu Settings window will open automatically.

- Enter your App ID and App Secret.
- Click OK to save.
Step 2: Select idibu as the posting provider
- In Tracker RMS, under Tools & Settings —> Application Settings left-hand menu, access Job Settings.
- Scroll down to the Job Board Settings section and select idibu as your Job Board Post Provider.

- Copy your Idibu Webhook Url.
Step 3: Configure the webhook
- Login to idibu as an administrator.
- Access Settings —> System settings —> Webhooks and click the Add Webhook button.
-
Configure the webhook by pasting the Payload URL you copied in the previous step.
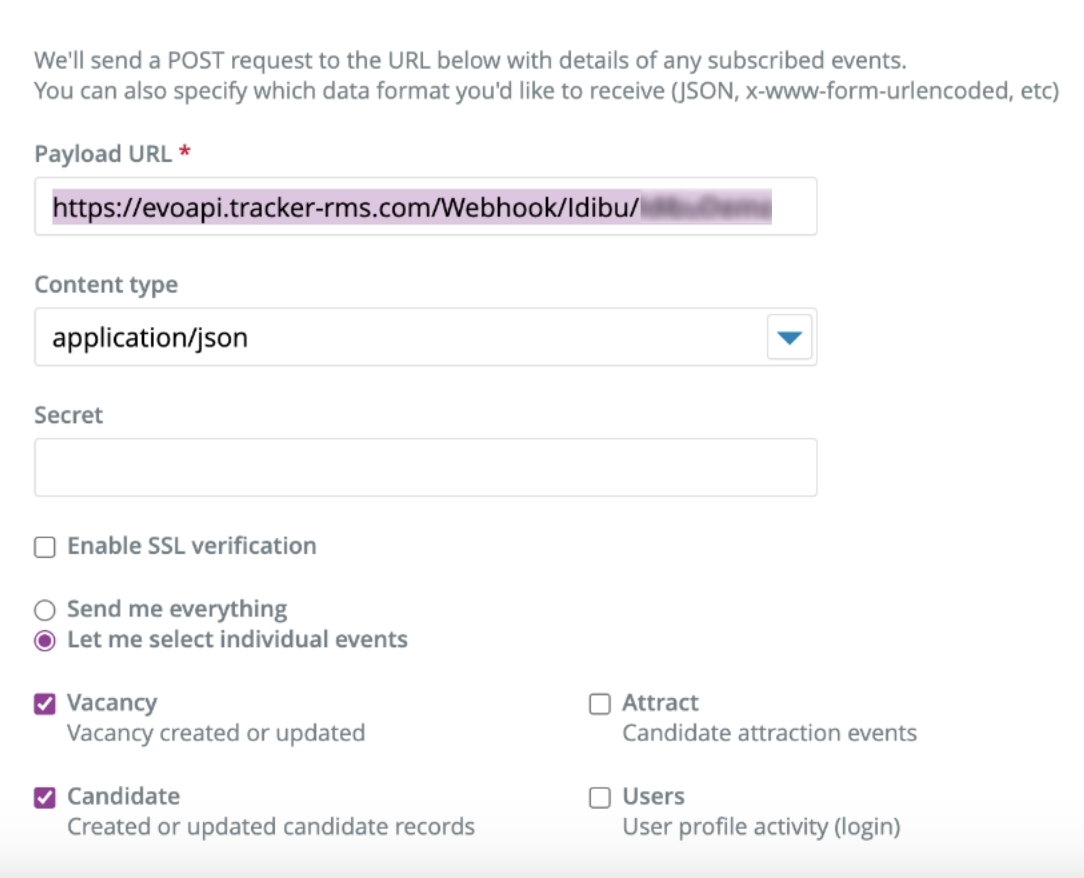
- Set the Content type to application/json.
- Only enable the Vacancy and Candidate events.
- Click Save Webhook.

You’re all set! Your idibu and Tracker RMS accounts are now connected, streamlining your recruitment workflow.
If you encounter any issues, double-check your App ID, App Secret, and webhook URL. For further help, contact Tracker and idibu support.