How to Set Up Auto-Responder Messages
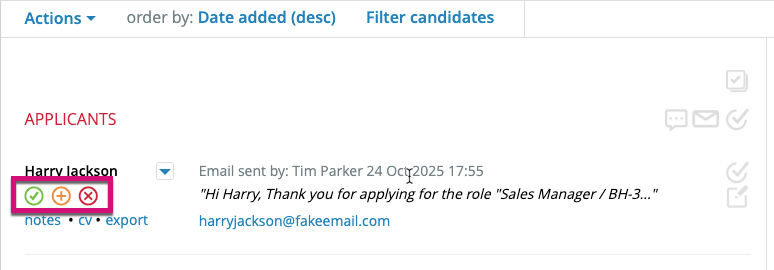
If you have auto-responders set up on your account, an automatic email will be sent to the candidate when you perform any of the three traffic light actions you use to process your applicants
Progress Keep on file Reject

Note: Some accounts have 'Reject' completely disabled on the account. To find out more, speak to your account administrator.
See the linked article for more details on applicant handling, but to briefly summarise, these buttons only appear against candidates when they are listed as applicants in the ATS of the vacancy they applied to.
How autoresponders work
The benefit of autoresponders is that they allow you to both improve and automate the candidate experience simultaneously. You don't even need to approve the email. It is set up by your account administrator**, and the message is tailored to the action you take when you use one of the three buttons above. So you need do nothing else.
Customising autoresponder messages
Autoresponder messages can be customised for groups, subgroups, or individual users.
When setting up the message, simply define the appropriate trigger rule to control who the message is assigned to.

**When autoresponders are activated, we provide default messages which are appropriate to the action, but we recommend the account administrator reviews and tailors these in line with your communication and candidate engagement policy. Speak to your account administrator if you would like to know more information about the wording of your autoresponder messages.
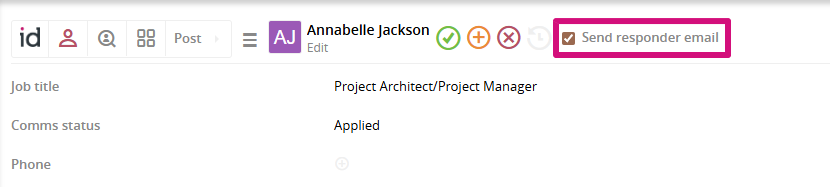
Optional responder emails
Responder emails are optional. By default, the 'Send responder email' checkbox is ticked when processing a candidate.
If you do not want an automatic email to be sent for a specific action, simply untick the 'Send responder email' checkbox before completing the action.